Guest Post: Even Layering Soap Tutorial
I am so excited to share this tutorial with you from Erin of Inner Earth Soaps, a super talented soapmaker from Sydney, Australia! If you’re anything like me, making even layers in cold-processed soap is a struggle! I’d much rather just make them messy and call it “textured”. Read on to find out how Erin gets hers to turn out so smooth!
Inner Earth Even Layering Soap Tutorial
This technique will give you beautiful even layers in your soap. I’ll be showing you three layers here, but you can of course do more! I’ve layered up to five colours using this technique.
Instructions:
1. Follow cold process soapmaking instructions up to the point where your caustic solution and melted oils have been mixed together.
2. Bring the raw soap to a very light trace with the stickblender. It should be lightly opaque but still quite runny.
3. Separate the raw soap equally into three separate containers. For this technique, it’s important to colour, fragrance, and trace each layer separately.
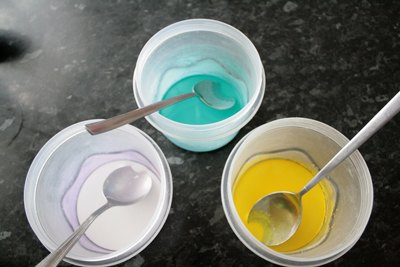
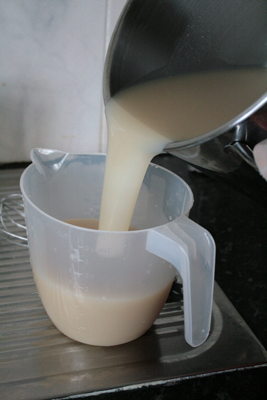
4. Take the soap that will be the bottom layer. Add colour and fragrance, and stickblend to a medium trace.
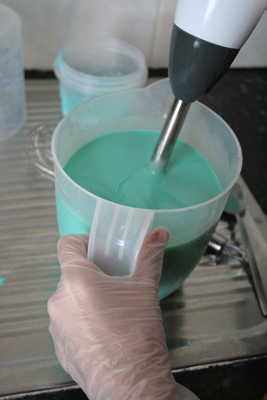
5. Pour the soap into the mould, slowly and steadily.

6. Use a spoon to push the soap around so that it’s evenly spread over the mould. Bang the mould gently on the bench to settle the soap and get rid of any air bubbles.
7. Put the lid or cover over the mould while you prepare the next layer – this will help the soap to set up a little so it’s firm enough to have the next layer spooned on top without mixing.
8. Colour, fragrance and trace your next layer.
9. Using a long-handled spoon, gently spoon the next layer on. Spoon evenly over the surface, spreading with the back of the spoon to smooth it out, and again banging the mould gently to get rid of any trapped air bubbles.

10. Repeat steps 8, 9 and 10 for the final layer.
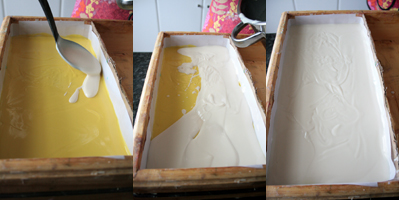
11. Add some pretty swirls to the top with a spoon end (or any tool you like).
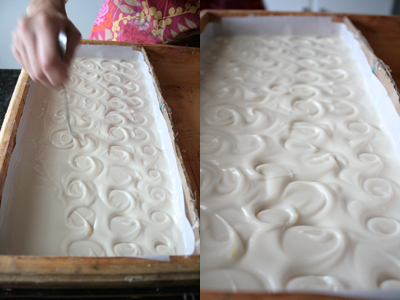
12. Cover and insulate for 12-24 hours before cutting.
13. Your finished soap should look like this:
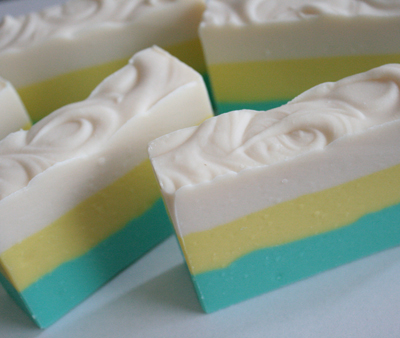
You can check out the Inner Earth blog and Facebook page.
Page with Comments
Comments are closed.

Just beautiful!!
My main problem is getting and keeping those vibrant colors. What are the Colorants that you used in this toutorial?
Mine either morph (micas) or change because of the scent I’m using (or because of the soap, especially if I use olive oil).
Thanks for sharing.
Gorgeous, fresh and clean looking! Love the colour combo. So fresh and inviting. LOVE it ! Thanks so much Amy for sharing this with us. Bravo !
hi, it´s really beautiful. I would like to know the basic recipe for this kind of soap. I live in a tropical and very humid country, and my recipes trace very quickly. Can you show me some récipes for this technique?
Thank you for the guest post. I have had the pleasure of using Erin’s soap before. I purchased from her about a year ago and I have always admired her work! Thanks again!
Sly, I used liquid soap dyes for these colours. They’re readily available here in Australia. I also add a smidge of titanium dioxide to make them pastel rather than bright.
Dolores, have you tried a basic olive, palm and coconut oil recipe? Equal amounts of each.
Unos colores bonitos y una explicación perfecta
♥♥♥
that soap is gorgeous!!can you please tell me where you purchased the measuring cup?
Just beautiful!!!!!!!
Hopefully I Intend on trying my hand at this. Would like a Book with Details. Love, peace & Harmony