Making Lotion: Formulating a Recipe
(This is part five of our lotionmaking tutorial. Please start at the beginning with the introduction, and work your way up.)
We are finally ready to start formulating our recipe! You will want to work in percentages so that you can duplicate it in any amount.
In order to make a simple lotion, let’s start out with
Water Phase:
78% distilled water
Oil Phase:
5% polawax
8% apricot kernel oil – or other light oil
6.7% shea butter – or mango butter
Additives:
0.3% liquid germall plus – or preservative of choice at manufacturer’s recommended amount
1% vitamin E
1% fragrance
Let’s say you are a soapmaker with a regular sized stick blender and a scale that measures hundredths of an ounce or 1 gram increments. You will need to make at least 16 oz. or 500 grams of lotion in order for the stick blender to be completely immersed and not be whipping lotion all over yourself. Multiply each percentage by 16 or 500, depending on the unit of measurement you feel most comfortable working with to determine the amount of each ingredient.
If you have invested in a mini mixer and a scale that measures in hundredths of a gram, you could make 100 grams of lotion simply by changing the percent amounts to gram measurements – 78% distilled water = 78 grams of water, etc.
Once you have your recipe written out in measurements, you can begin! For demonstration purposes I will be making the smaller batch, just switching the percent amounts to grams.
1. Sterilize all of your bowls, spoons, counterspace, and hand blender.
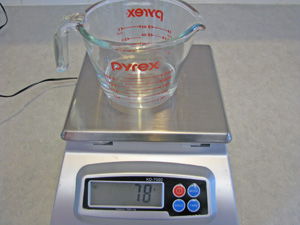
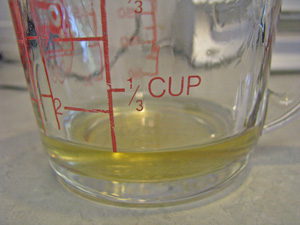
2. Weigh the distilled water in a pyrex measuring cup that is large enough to hold your total amount of ingredients. I had to use my large scale, since my small one will only weigh up to 50 grams.
3. Heat the water to 170 degrees.
Your method of heating could be one of two things: either creating a double boiler system on the stove, or using your microwave (make sure it is clean!). Some people argue that valuable nutrients are lost from the use of the microwave. I haven’t noticed a difference in the feel of the lotion by using the microwave, although I do use half power when heating my oil phase ingredients. It would be hard to say if the structure or nutrients of the oils have been compromised. If someone knows of a study where this has been proven, I would love to hear about it.
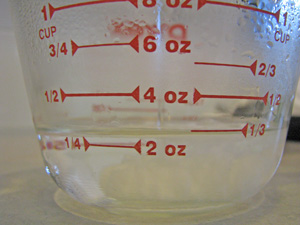
4. Weigh the polawax, apricot kernel oil (or other light oil) and shea (or mango) butter in another glass cup, and heat to 170 degrees.
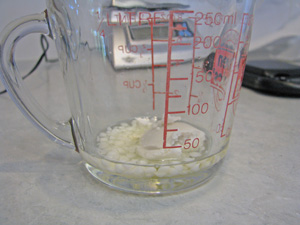
After one minute in the microwave on half power, the polawax and shea butter aren’t completely melted, let alone 170 degrees:
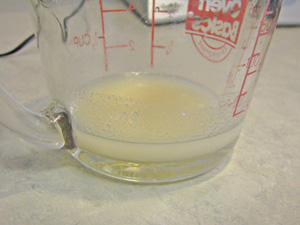
Just thirty seconds more at half power gives the results we want:
5. Once the liquid and oil phases have been heated, check to be sure the temperatures are within 10 degrees of one another and pour the oils into the water. (It’s a bit more difficult to keep both phases near the same temperature when you are making a very small batch. Just re-heat as necessary.) Agitate with your high shear mixer or hand blender. This is my favorite part of the process since you can immediately see the water get cloudy when the oils are poured in.
6. Weigh the vitamin E, preservative and fragrance; add them to the emulsion after it cools to 100 degrees or less. You can speed up the cooling process by placing the measuring cup of fresh emulsion in an ice water bath – either using the container you used for your double boiler system, or another larger bowl, being very careful not to contaminate the lotion.
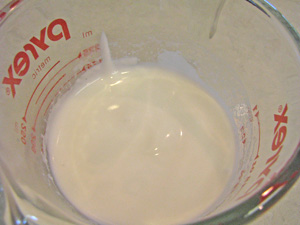
Here is the final lotion, complete with additives. It’s a little on the thin side right now, but it will thicken as it cools. I always test a little bit on the back of my hand, just because I can’t help myself, and I must say this one feels very nice!
7. At this point, I cover the pyrex cup with plastic wrap to protect the lotion inside, leaving the spout hole open. Then I let the lotion set up overnight to see what the final texture and thickness will be.
Perhaps you are wondering about adding color. There aren’t any natural ways to color your lotion. Some people are more interested in color and fragrance than how natural your product is, so this may not be a problem. If you want to color your lotion, you will need to have a very white lotion base, and use water-soluble dyes. I have successfully used several different brands of FD&C dyes. MMS has a water-soluble dye kit with three colors that you can mix. I haven’t used it before, but it looks like it would work well, and is less expensive than others I’ve seen. It only takes a few drops, so add a few at a time until you get the desired brightness.
What if you aren’t satisfied with the results of your lotion so far? Our next lesson will be ways we can tweak our recipe!
Page with Comments
Comments are closed.
I found that so interesting to read! I had no clue how lotion was made. But somehow I would screw it up….I was no science major, trust me. See, that’s why I order my shea butter lotion from YOU!!
Helene’s last blog post..The Tower of Terror….or, if you will, the journey of motherhood
And technically…..the whipped shea butter isn’t a lotion because it isn’t an emulsion. It’s just shea butter, jojoba oil, cocoa butter, and vitamin E – no water or emulsifier. I’m so glad you like it though! 🙂
Can I use bees wax for an emulsifier? And can use another oil instead of a butter? I have acne prone skin and not too sure about the butters.
Amber – I have seen recipes that use beeswax and borax as an emulsifier, but I have never tried it. I’ve heard from other formulators that it is not a very stable emulsion and tends to separate. I would probably prefer to use polawax and substitute another oil for the shea butter. You may need to decrease the water to make up for the thickness you lose by using a liquid oil rather than the butter.
Has anyone heard of the all natural preservative, Suprapein? Its a proprietary blend of botanical extracts. I’ve heard concern regarding the rosemary extract on pregnant women. I haven’t heard anything negative about its effectiveness though. Has anyone heard anything or tried it themselves? I’m thinking about ordering it.
@Danielle – I wouldn’t waste my money on it. From what I’ve heard, the Suprapein stinks like sulphur, if not initially then eventually it causes your lotion to smell like it and is difficult to cover the scent. Dr. Cindy Jones hasn’t been convinced that it’s an effective preservative either. That’s what I’ve heard.
Yeah, I’m leary of it. Prob gonna stick with either the optiohen or the Tinosan for now. Thanks
Amber, I also have acne prone skin but after reading a bit about Shea butter I believe it is a good choice because it is said to not clog pores and offer our skin wonderful benefits. I am not a pro but I recently read up on it. Hope that helps.
I am very new to making creams and gave some to friends for Christmas. They can’t get enough and I am seriously thinking about going into business. I have a silly question, maybe my brian is not working too good. How do I convert my recipe into percentages? So tbsp, tsp and EO drops into % ?
@Sonya – You will need to weigh all your ingredients as you add them so that next time you will have a consistent reference point. Once you know the weight, you can work in percentages.
Hello. I tried this recipe with the following substitutions. Aloe vera juice instead of water. 6% safflower and 2% jojoba oil instead of apricot kernel oil. When done, the lotion was slightly thick but still nice. Over the next 24 hours the lotion started to solidify. In the next day or two it became too solid to use or consider a lotion. Any ideas on why this happened? And suggestions on how to correct this problem? Thanks!
@E – I can’t imagine why this happened. Your substitutions are pretty normal. I’ve used both aloe vera juice and jojoba oil successfully in lotions before. The only one I haven’t tried is safflower, but I can’t think of any reason why this would have caused any issues. I’m stumped!
Amy – I’m stumped too! I’m sure I measured everything correctly. But think maybe to decrease the wax amount? But I may have a problem with the lotion emulsifying properly. Or I thought if using a different Shea Butter. Is there one that you recommend? I used a hand mixer instead of a stick blender. I don’t think this would be the problem though. I’m going to try making again, making a few small adjustments and a stick blender. We’ll see what happens!
@E – You can certainly try decreasing the wax amount. I don’t really have any other suggestions!
Hi,
I just wanted to mention that their are many ways to colour things naturally. Cacao powder for brown, beet root powder or hibiscus tea for red, a tiny bit of chlorophyll for a pastel green (more for darker), different coloured clays, tumeric or paprika for an orangey colour, etc.
Hope that helps someone!
Great recipe! Thanks for sharing!
I was wondering if this makes your hands shiny at all? Also, can you pump it out from a bottle?
@Angel – I don’t know that it makes your hands shiny…maybe at first, but it would soak in pretty quickly. Yes, I believe it can be pumped from a bottle.